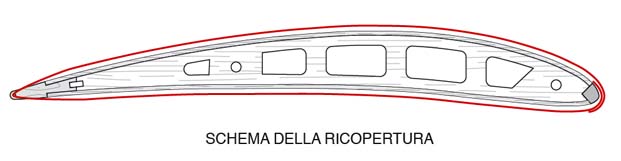
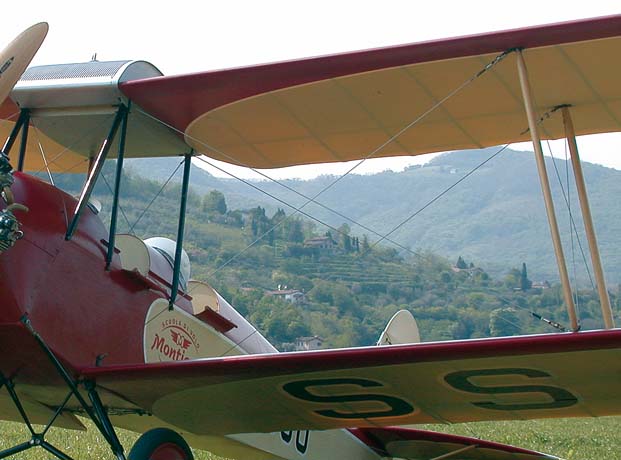
Starting fron the Wright brothers biplane to the thirties, many airplanes featured the wing trailing edge , and often even the tailplane with steel wire. This method featured , once the covering fabric was tight, the typical “bat” or “wavy”trailing edge design. Usually modellers simulate such design shaping the balsa trailing edge. This method however, unless is done by an expert, turns out to be very delicate and approximative unless a light plywood is added to the balsa.
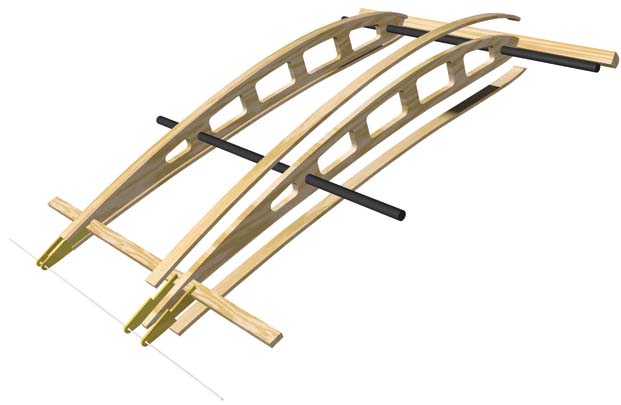
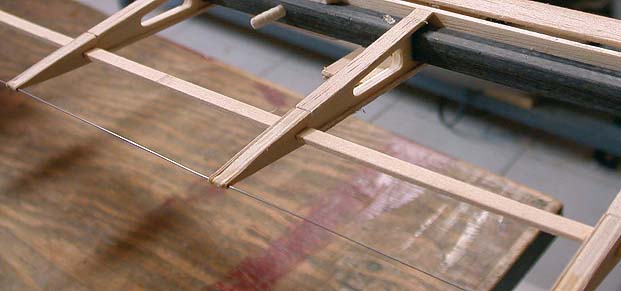
I, as usual, copied the original system and use a 0.5mm steel piano wire as trailing edge, that as it’s covered with the fabric takes the shape of the “bat” design trailing edge same as the full scale planes. The drawings below show the system I used for the wing of my Fokker DR1, in this case I used some carbon fiber tubes as main spars. I used some 1mm plywood end caps, cut on the CNC pantograph, to keep the wire in line, anyway there are other methods. To be noticed the necessary small longheron ,about 2x5mm, positioned very close to the trailing edge.
Some tricks must be used in order to use such technique:
1) The wing must be covered with a single piece of fabric, with the junction and the overlap under the leading edge. This requires the use of fabrics having the proper height, for instance the Solartex is about 60cm, therefore allows the covering of wings having maximum a 29cm chord. The Dacron® I am currently using is 160cm high, and I had no problems so far.
2) The trailing edge of the two end ribs must be properly reinforced because the fabric tension pulls strongly on the wire.
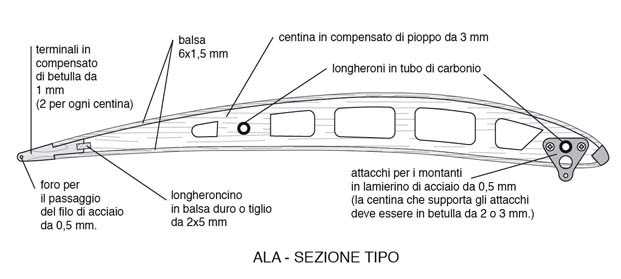
The picture 2 shows the system used on my Caproni Ca100.
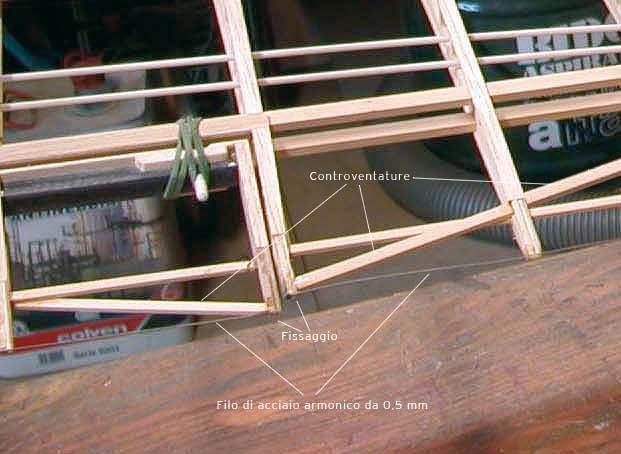
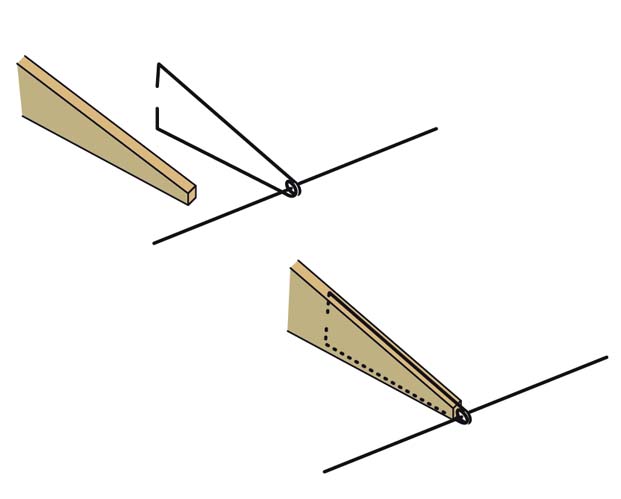
Another way to fix the wire, if you don’t own a CNC pantograph, is to make some eyelets using the 0,5mm piano wire and epoxy them to the end of each rib (drawing below). This system that I used on my Albatross D5a works equally well and it’s stronger than the previous one.