
I have been using the vacuum forming tecnique for many years. It’s a very popular technique in the world of aeromodelling, especially to make clear canopies, engine cowls and wheel pants.
Personally I am not in love with the products made using such method, especially for the wheel pants and the engine cowls for internal combustion engines. The materials used, ABS, PVC, Styrene etc, are not very sturdy and tend to crack and break easily. For the canopies, instead, the use of vacuum forming is basically mandatory. I use such technique also to make instrument panels , interiors and other details not subjected to wear. A less common method is the making of vacuum formed moulds for composite materials for small productions. Basically, once the wodden or other material mockup is made, rather than making a complicate fiberglass mould it’s quicker to make it out of 2mm thick vacuum formed plastic. The system I built works flawlessly and it’s worthwhile to describe it.
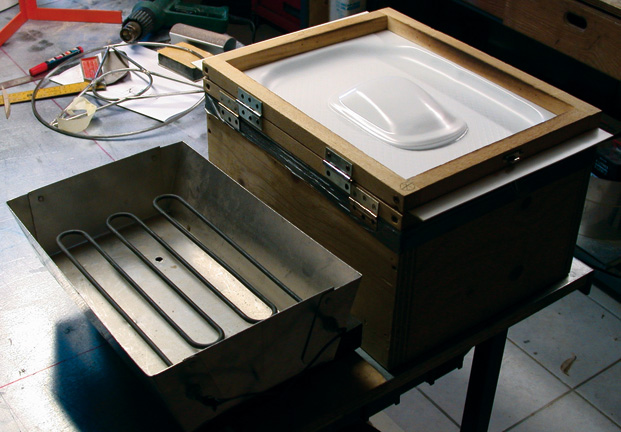
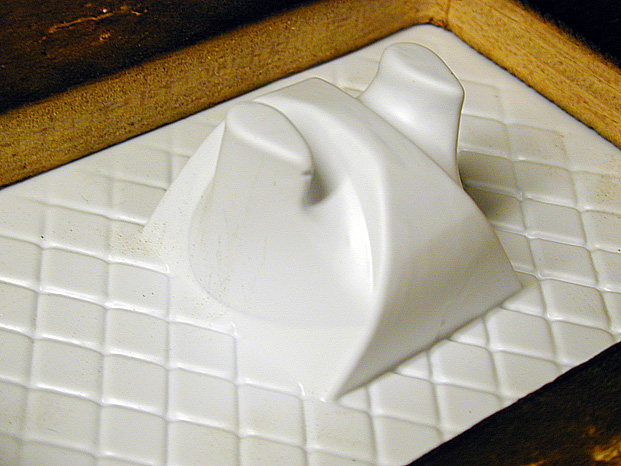
The picture above clearly shows the vacuum forming machine that I just used to form one of the seven fairings for the engine cowl of my Bucker, in this case the fairings have been used on the Styrofoam matrix.
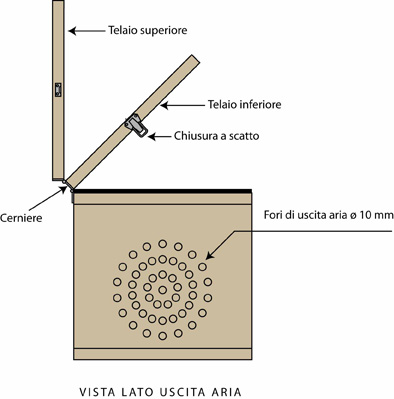
In the section below it’s clearly shown the functioning of the vacuum box. It’s a 19mm plywood box which hosts inside a divider containing a vacuum cleaner motor, obviously the more powerful the motor the better. The motor takes in air through some holes located on the top side and expells it through 10mm holes in the back. A strong and small hole mesh, which I recommend to be at least 35x50cm, has to be positioned on the top side, you can find a good selection at the hardware store.
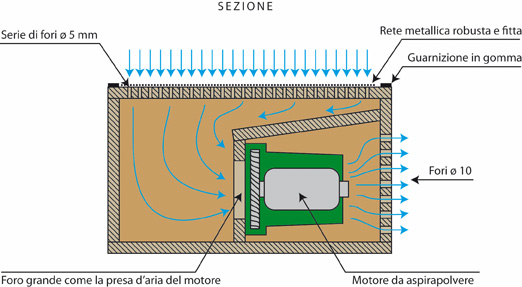
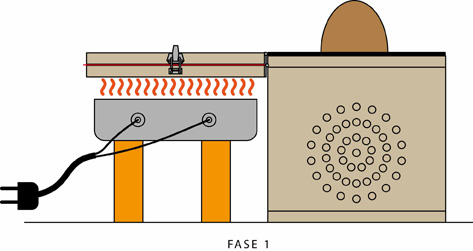
The mesh prevents the plastic, softened by the heat, from entering the 5mm holes and obstruct them. Alternatively many 2-3mm holes can be drilled so to avoid the use of the mesh, in this case it’s important to roughen the surface a little so that the plastic does not stick too much preventing the air from escaping. I cross milled, with the cutting pantograph, several areas making a hole at each intersection , but not everybody owns a CNC pantograph. A rubber stripe has to be attached all along the edge of the panel. Two frames will then be attached, using 4 hinges, to the panel and the plastic sheets to be vacuum formed will go in between. I mounted on my frames two spring locks to keep still the plastic sheets, one on the front would be enough though. The vacuum forming consists of two stages, the heating of the sheet and the vacuum forming itself. A 1600 watts oven resistor is used to heat the sheet, the resistor has to be positioned inside a sheet metal tub or a oven tray of appropriate dimensions, bolting it to a side of the tub. Be careful and make sure the electrical terminal clamps get well insulated, needless to say you can’t fool around with the electrical current.
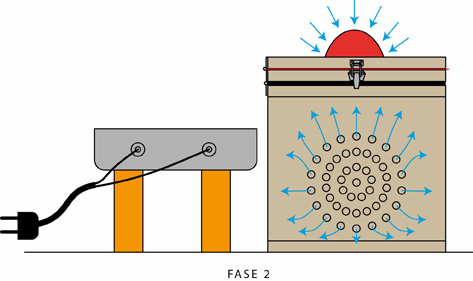
The tub must be located as per drawing, and the frame with the plastic sheet has to be turned upside down on the tub when the resistor is well heated. The matrix on which the sheet will be formed has to be positioned at the center of the vacuum table. Now the plastic sheet must be observed carefully: the sheet will first curl up, then will strech out, after the sheet will start to give up caving in downwards. At this point the double frame has to be immediately turned upside down on the matrix and the aspitaror must be turned on , after the resistor is turned off so to avoid electrical overloads and... the miracle is done! ..., and with some practice it’s even fun.
Suggestions
1) Keep in mind that the plastic will tend to round up near the base of the matrix, so if you want a perfect adhesion a spacer of about 1cm must be positioned under the matrix lined up with the base.
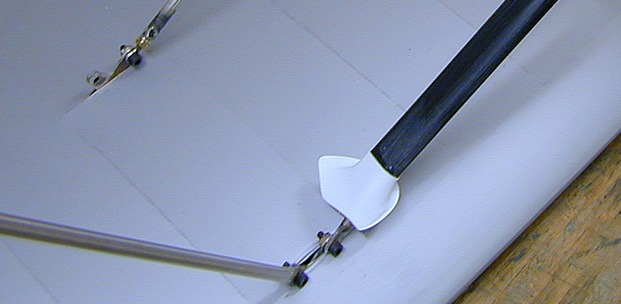
2) To form small parts without having to use a 35x50 sheet, a frame reducer can be made with a piece of plywood inserted in the frames with a rectangular opening of about 15x15cm in the center to which small plastic sheets can be stapled to. The pictures below show the fairings of the struts, made with a frame reducer, of my first Ro41.